Install YAFFA using XAMPP for Windows
This guide will help you install a basic working instance of YAFFA on your Windows machine using XAMPP.
XAMPP is a software stack for Windows, consisting of Apache, MySQL, PHP. At this point, we assume that you have already installed XAMPP on your computer. You can read about the environment requirements in the Technology stack guide.
Because YAFFA does not ship pre-built frontend assets, this installation method also requires Node.js and npm on your Windows machine so you can build the frontend locally. If you want to avoid installing and using the frontend toolchain on the host, use the Install YAFFA using Docker for Windows guide instead.
XAMPP ships with older versions of PHP, which are not compatible with YAFFA. In order to run YAFFA, you need to update the PHP version of your XAMPP installation to at least version 8.4. You can find various guides on the internet on how to do this, but it is not covered in this guide. If you are not comfortable with updating the PHP version of your XAMPP installation, we recommend using the Docker-based approach to run YAFFA, which will take care of installing the necessary server environment within containers. For step by step instructions on how to install YAFFA using Docker, see the Install YAFFA using Docker for Windows guide.
This guide is intended for users who are comfortable with updating the PHP version of their XAMPP installation, and who prefer to run YAFFA directly on their host machine without using Docker.
1. Start your XAMPP environment
- Start XAMPP on your computer, and using the XAMPP control panel, start Apache and MySQL services as illustrated below.

This will start the Apache web server and MySQL database server, which are required to run YAFFA. It will allow you to execute the tasks needed to install YAFFA, and later to access the application from your browser.
2. Prepare Your Database:
YAFFA stores its data in a MySQL database. This includes varius assets like accounts, payees, categories, and also the transactions you record. You need to create a new database and a user with the necessary permissions to access it.
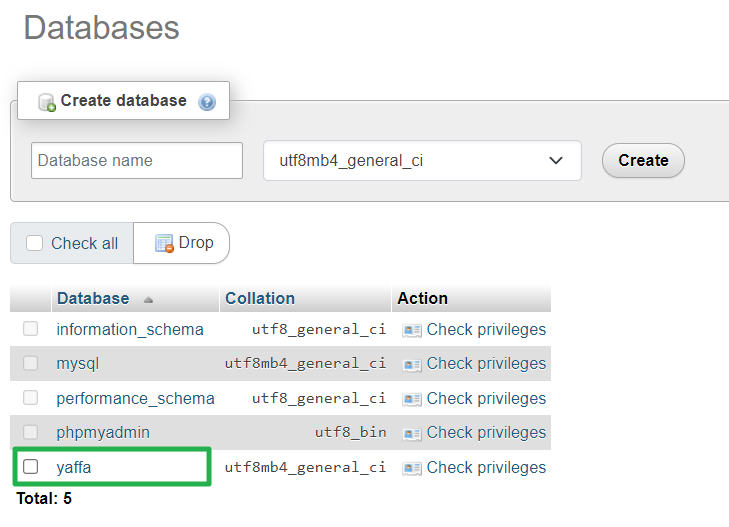
- Open PhpMyAdmin, which comes bundled with your XAMPP installation. This should be available at http://localhost/phpmyadmin
- Create a new user and a database for YAFFA, noting the username, password, and database name for the upcoming configuration.
- For this guide we are using username
yaffawith passwordpasswordand database namedyaffa.
- For this guide we are using username
3. Download YAFFA
As a next step, you need to download the files of YAFFA. For this, we will use Composer, a dependency manager for PHP. If you don't have Composer installed yet, you can download it from https://getcomposer.org/download/. You also need Node.js and npm installed on Windows so you can build the frontend assets after the PHP dependencies are in place.
-
Start your Command Prompt or Powershell
-
Navigate to your XAMPP installation directory, and open the Document Root folder (commonly C:/xampp/htdocs)
-
Create a dedicated folder for YAFFA, for example
yaffa, and enter it -
Download YAFFA using Composer, with the following command
composer create-project kantorge/yaffa --no-dev --no-script --prefer-dist .- This will download the latest version of YAFFA from Packagist, and install it in the current folder, including all its dependencies. Wait until the entire process is complete, it can take a minute or two, depending on your bandwidth and computer.
-
Install the JavaScript dependencies required by the Vite frontend build:
npm install -
Build the production frontend assets:
npm run build
4. Configure YAFFA
As any Laravel application, YAFFA needs to be configured to work with your environment. This includes setting up the database connection, application key, and other settings.
-
The settings of YAFFA will be stored in a .env file. While still in your YAFFA folder and your command prompt, make a copy of the sample .env file.
copy .env.example .env -
One important setting is the application key. It can be edited in the newly created .env file directly, or it can be created by running the following command. (Assuming that XAMPP is still running.)
php artisan key:generate -
Open the .env file with a text editor of your choice, and make the following settings as a minimum:
- Set the database connection parameters according to the values you have used to create the MySQL user and database. Use the
DB_DATABASE,DB_USERNAMEandDB_PASSWORDsettings accordingly. - Review the APP_URL, if you would like to use something else than
http://yaffa.testto access YAFFA from your browser.
- Set the database connection parameters according to the values you have used to create the MySQL user and database. Use the
For a basic setup, you can leave the other settings as they are. You can always come back and adjust them later. For a comprehensive list of settings, refer to the comments and descriptions in the .env.example file, which was added to the installation folder. Some of these are also covered in the Advanced settings guide.
5. Set the selected host by editing the hosts file
You need the change some system settings so that your computer knows where to find YAFFA when you type the URL in your browser.
-
Open the hosts file with any text editor as an administrator (usually located at C:/Windows/System32/drivers/etc/hosts). Add the following line:
127.0.0.1 yaffa.test
This setting instructs Windows to redirect the requests for yaffa.test to your local machine, where the Apache server is running.
6. Edit Apache settings within XAMPP
Next, you need to configure Apache to serve YAFFA from the correct folder.
-
Locate the
httpd-vhosts.conffile in your Apache’s conf directory (e.g., C:/xampp/apache/conf/extra/httpd-vhosts.conf). Add the following lines and save the file. Adjust the path to your installation, if needed.<VirtualHost *:80>
DocumentRoot "C:/xampp/htdocs/yaffa/public"
ServerName yaffa.test
<Directory "C:/xampp/htdocs/yaffa/public">
Options Indexes FollowSymLinks
AllowOverride All
Require all granted
</Directory>
</VirtualHost> -
Restart Apache from the XAMPP Control Panel to apply these changes.
7. Build the YAFFA database
In an earlier step you created a database and a user for YAFFA. Now it's time to create the tables and relationships that YAFFA needs to function. Fortunately, Laravel provides a convenient way to do this.
-
In the command prompt, from the directory where YAFFA is installed, run the following command to create all the database tables, that are used by YAFFA.
php artisan migrate
8. Launch YAFFA
Congratulations! You’ve successfully installed YAFFA on your Windows machine using XAMPP. Open your browser and visit the specified URL, e.g., http://yaffa.test, to access your newly installed YAFFA instance.
Enjoy managing your finances with ease! If you encounter any issues, refer to our documentation or reach out to us for assistance.
For instructions on the first steps to start using YAFFA, please visit the guide on the registration.
Once you have YAFFA up and running, there are some additional configurations you should do to enable all the features of the application. Please proceed to the next section of the guide, which covers the configuration of cron jobs and queue workers using Windows Task Scheduler.
9. Additional configuration
Configure CRON jobs using Windows Task Scheduler
YAFFA uses Laravel's built-in task scheduler to execute certain background tasks on a regular basis. These tasks might include updating exchange rates, downloading investment prices, caching certain values, and automatically recording recurring transactions. To enable these features to work properly, you need to set up a scheduled task in Windows that runs the Laravel scheduler every minute.
On Linux systems, this would typically be done using a cron job entry like:
* * * * * cd /path-to-your-project && php artisan schedule:run >> /dev/null 2>&1
On Windows with XAMPP, the equivalent is achieved using the built-in Windows Task Scheduler. Follow these steps to set up the scheduler:
Step 1: Open Windows Task Scheduler
- Press
Windows key + Rto open the Run dialog - Type
taskschd.mscand press Enter to open the Task Scheduler application - Alternatively, you can navigate to it through the Control Panel: Settings → Administrative Tools → Task Scheduler
Step 2: Create a new basic task
- In the Task Scheduler window, click on "Create Basic Task" in the right sidebar
- A dialog box will appear. Enter:
- Name: YAFFA Scheduler (or any name you prefer)
- Description: (Optional) Runs the Laravel schedule:run command for YAFFA tasks (optional, but recommended for clarity)
- Click Next
Step 3: Set the task trigger
The trigger determines when the task will run. Since we need the scheduler to run every minute:
- Select "Repeat a task"
- Set the frequency to run "every day"
- When prompted, set the recurring frequency to "every 1 minute" (if available) or select "Custom" to set it to repeat every minute
- If your version of Task Scheduler doesn't show a "minutes" option, you may need to select "On a schedule" and then choose "Repeating" with a 1-minute interval
- Set an optional start time if you want the task to begin at a specific time, otherwise it will start immediately
- Click Next
Step 4: Configure the action
- Select "Start a program"
- Click Next
Step 5: Specify the program and arguments
Now you need to tell Task Scheduler to run PHP with the Laravel command:
-
Program/script: Browse to and select the PHP executable from your XAMPP installation. The typical path is:
C:\xampp\php\php.exe(Adjust the path if you installed XAMPP in a different location)
-
Add arguments: Enter the path to the artisan command and the schedule:run action:
"C:\xampp\htdocs\yaffa\artisan" schedule:runMake sure to replace
C:\xampp\htdocs\yaffawith the actual path to your YAFFA installation. -
Start in (optional): You can enter the YAFFA installation directory:
C:\xampp\htdocs\yaffa -
Click Next
Step 6: Review and create the task
- Review all the settings you've configured
- Check the "Open the Properties dialog for this task when I click Finish" checkbox if you want to make advanced adjustments (such as running the task regardless of user login status)
- Click Finish to create the task
Step 7: Verify the task configuration (optional but recommended)
To ensure the task is properly configured and runs correctly:
- In Task Scheduler, locate your newly created task in the task list
- Right-click on it and select "Run" to execute it manually
- Check the task history to verify it ran successfully
- If errors occur, check the last run result column for error codes and adjust the configuration accordingly
Important considerations
-
XAMPP must be running: The Task Scheduler task will only work if XAMPP (specifically Apache and MySQL) is running on your machine. If you prefer the scheduler to run even when you're not actively using XAMPP, you may want to configure XAMPP to start automatically with Windows.
-
User permissions: Ensure that the user account running the scheduled task has appropriate permissions to access the YAFFA installation folder and the PHP executable.
-
PHP path: Verify that the path to
php.exeand your YAFFA installation is correct. Incorrect paths are the most common cause of task failures. -
Log output: Unlike the Linux cron job above which redirects output to
/dev/null, you may want to keep the default behavior or configure Task Scheduler to log output for troubleshooting purposes. If the task fails silently, check the Task Scheduler history for error messages.
Configure Queue Workers using Windows Task Scheduler
In addition to the Laravel scheduler for scheduled tasks, YAFFA may dispatch certain operations as queued jobs. These jobs are placed in a queue and need to be processed by a queue worker running in the background. Queue workers continuously listen for new jobs and execute them asynchronously, which prevents long-running operations from blocking the web request.
The Laravel queue worker is started using the command:
php artisan queue:work
On Linux systems, queue workers are typically kept running continuously using a process manager like Supervisor. On Windows with XAMPP, you can use Windows Task Scheduler to start and maintain a queue worker process. However, unlike the task scheduler which runs once per minute, the queue worker needs to run continuously in the background.
Step 1: Create a batch script to run the queue worker
To make it easier to run the queue worker from Task Scheduler, it's helpful to create a batch script.
-
Open a text editor (Notepad, VS Code, etc.)
-
Create a new file and add the following content:
@echo off
REM Queue Worker for YAFFA
REM Change to YAFFA directory
cd C:\xampp\htdocs\yaffa

REM Start the queue worker
C:\xampp\php\php.exe artisan queue:work

REM If the worker stops for any reason, wait a moment and return to allow restart
timeout /t 5 -
Replace
C:\xampp\htdocs\yaffawith your actual YAFFA installation directory -
Replace
C:\xampp\php\php.exewith the correct path to your PHP executable if needed -
Save this file with a
.batextension, for example:queue-worker.batin your YAFFA root directory
Step 2: Create a task in Windows Task Scheduler
Unlike the scheduler task which runs every minute, the queue worker should run continuously as a background process. You'll create a task that starts the worker at system startup or on-demand.
- Open Windows Task Scheduler (as described in the CRON section above)
- Click "Create Basic Task" in the right sidebar
- Enter:
- Name: YAFFA Queue Worker (or any name you prefer)
- Description: (Optional) Runs the Laravel queue worker to process queued jobs
- Click Next
Step 3: Set the task trigger
- Select "At startup" - This will start the queue worker automatically when Windows boots
- Alternatively, if you prefer to start it manually or on a schedule, you can choose other triggers
- Click Next
Step 4: Configure the action
- Select "Start a program"
- Click Next
Step 5: Specify the program and arguments
-
Program/script: Browse to your batch script, or enter:
C:\xampp\htdocs\yaffa\queue-worker.bat(Replace with your actual path to the batch script)
-
Start in (optional): Enter your YAFFA installation directory:
C:\xampp\htdocs\yaffa -
Click Next
Step 6: Review and finish
- Review the configuration
- Check "Open the Properties dialog for this task when I click Finish" if you want to make advanced adjustments
- Click Finish
Step 7: Configure advanced settings (recommended)
After creating the task, it's important to configure some properties to ensure the worker runs reliably:
- Right-click on the YAFFA Queue Worker task in the Task Scheduler list
- Select "Properties"
- Go to the "General" tab and make these adjustments:
- Check "Run whether user is logged in or not" - This allows the worker to continue running even when you're not logged into Windows
- Select "Do not store password"
- Check "Run with highest privileges" (optional, but recommended for avoiding permission issues)
- Go to the "Settings" tab and configure:
- Check "Allow the task to be run on demand"
- Check "Run the task as soon as possible after a scheduled start is missed"
- Set "If the task fails, retry every:" to something reasonable, like
5 minutes - Set "Attempt to run tasks for" to
1 dayor more - Check "If the running instance of the task does not end when requested, force it to stop"
- Set the timeout to something reasonable, like
1 hour(this allows the worker to run and restart regularly)
- Click "OK" to save the settings
Step 8: Start the queue worker
You can start the queue worker in several ways:
- Automatic startup: If you set the trigger to "At startup" and configured "Run whether user is logged in or not", the worker will automatically start when Windows boots
- Manual start: In Task Scheduler, right-click on the YAFFA Queue Worker task and select "Run"
- Verify it's running: Check if a PHP process is running with the command line arguments that include
queue:work
Important considerations
-
XAMPP must be running: The queue worker communicates with your database and application code, so Apache and MySQL must be running. If you set the worker to start at system startup but XAMPP doesn't start automatically, the worker may fail to connect to the database. Consider configuring XAMPP to start automatically, or start XAMPP manually before the worker needs to process jobs.
-
Continuous vs. one-time execution: Unlike the scheduler which runs briefly once per minute, the queue worker runs continuously. The batch script includes a
timeout /t 5at the end, which allows Windows to attempt a restart if the worker unexpectedly exits. Task Scheduler will automatically restart the worker if it fails. -
Database connection: Queue workers maintain a database connection. If the connection is lost (e.g., due to XAMPP restarting or network issues), the worker will retry automatically.
-
Monitoring: Open Task Scheduler and check the "History" tab on the queue worker task to see if it's running and if there are any errors. You can also check Windows Task Manager to verify that a PHP process is running.
-
Testing the queue: To verify that the queue worker is functioning correctly, you can dispatch a test job from the YAFFA application. If the queue is configured to use the
databasedriver (which is the default), jobs will be stored in the database and processed by the queue worker when it picks them up.
If jobs are not being processed, check the following:
- XAMPP (Apache and MySQL) is running
- The queue worker task is running (visible in Task Scheduler history)
- The PHP path in the batch script or Task Scheduler is correct
- There are no PHP errors preventing the worker from starting
- The database queue table exists and has the proper configuration
If you continue to encounter issues with the queue worker, reach out to us for assistance.